Last week I had the opportunity to attended the annual Arizona Department of Public Safety BBQ to benefit Arizona Special Olympics. The event raises money for the charity through the sale of raffle tickets and donations. Attendees are greeted with a catered BBQ lunch, live band, and a variety of displays including the DPS Helicopter, SWAT unit, DUI Van, K9’s and much more.
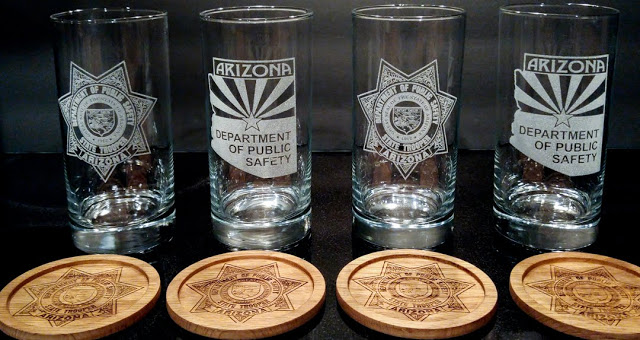
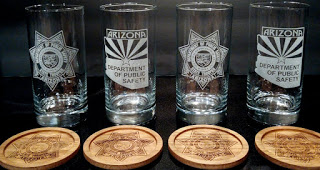
A few weeks prior to the event I was asked if I’d like to donate something unique to this years raffle. After thinking about the the different items that I’ve made, I settled on a set of four laser engraved glasses featuring the DPS Star and Patch worn by Arizona state troopers. I needed a box for the glasses so I decided to make one along with a set of coasters. I added the DPS Star to the box and coasters to give a nice finished product. Below is a the completed set that I donated to the raffle.
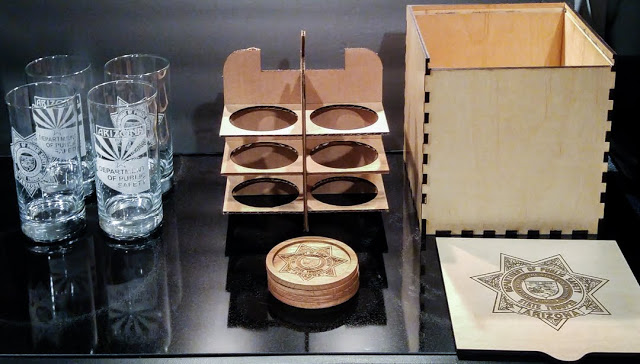
I’ve been laser engraving glasses for over a year now but haven’t done a lot of boxes. I knew I needed to design the box around the set of four glasses. I first needed to decide on a layout for the box, which went back and forth between having the glasses laying flat, side by side or standing up in a two by two configuration. I eventually settled on a cube shaped box with the glasses standing. This gave the most efficient use of materials and would present a more compact footprint for storage.
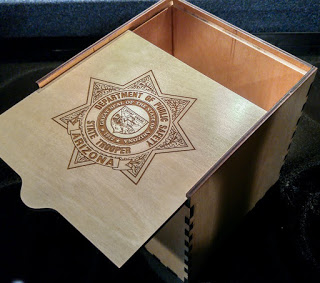
I started out with a tabbed box designer that takes the height, width, and depth along with kerf (beam or blade width) and generates a vector file. The box can be cut directly from the output file but it’s pretty generic at that point. I took the file into Adobe Illustrator where I modified it with the logo and extended the top three edges, removing the tabs, to allow for the sliding lid design that I wanted to use. I adjusted the lid by removing the tabs and adding a small pull tab. After everything was where I wanted it, I sent it to the laser and cut out the design using quarter inch birch plywood. I then used a router to make the grooves in the sides and back. After a light sanding, I fitted the box together and used wood glue on the seams inside to hold everything. Once the glue dried I used a food safe Butcher Block Conditioner made with Bee’s Wax and Mineral Oil to coat the box inside and out. This seals the wood and keeps things food safe without introducing harsh chemicals or stains to a product intended for drinking glasses.
I also wanted to include a set of redwood coasters with the glasses. I measured the base of one of the glasses and knew that I would need to allow for a little extra room in the inset of the coaster. Using Autodesk’s Fusion 360 CAD/CAM software I came up with a simple design which I was able to send to the CNC. After the coasters were done on the CNC, I did a little sanding and then loaded them into the laser and engraved them with the DPS star. From there they received several coats of butcher block conditioner, which really brought out the redwood.
The last step was to to come up with something that would hold the glasses securely in the box without allowing them to touch. For the lay down design I had intended on using natural wood packing like wine bottles often ship in, but this needed something a little more creative. I have lots of cardboard that I try and re-purpose instead of letting it end up in a landfill. Using Adobe Illustrator, I made a 2D 7×7 shape with the holes for the glasses and then went back to Fusion 360 where I extruded the 2D shape to a 3D, 7x7x7 cube which I then sent into Autodesk’s 123D Make program. 123D Make is a slicer program that takes 3D objects and slices them up in a variety of ways to use in 3D printers, laser, CNC, etc. For the purpose of the box insert, I chose to make radial slices with four slats coming out at 90 degree angles and then intersecting the 3 horizontal layers. The file 123D Make is basically a sheet with each layer drawn out for cutting. I went back to Illustrator and rounded the top edges and made the notch in the middle for the coasters to rest above the glasses. I sent the file to the laser and cut the entire insert out of cardboard that I was able to recycle. The pieces fit together with a snug fit to keep everything tight. When I first inserted the cardboard frame into the box it was really tight, to the point that I though I would have to re cut the cardboard. After realigning the cardboard it pushed into the box with a nice snug fit.

Everything came together nicely and hopefully will bring a smile to the person that won it in the raffle.


